


There’s nothing more frustrating than trying to remove a stuck-on seal from your RV…only to have the seal refuse to budge. Anyone who’s ever worked with Diamond Shield® knows that. Although the protection provided to your car or RV can be nice, trying to remove it, this adhesive—well, that’s a different story altogether.
But if you have the right tools and tips for removing adhesives from your RV, it doesn’t have to be such a frustrating experience. Here’s how to do it the easy way:
The Problem: When Adhesives Turn South
No one wants to deal with paint chips and rock scratches. So it’s no surprise that many dealers across the United States have put Diamond Shield on the backs of cars and RVs. Diamond Shield is a thin, clear adhesive that seals directly onto a car and, once attached, does add plenty of protection.
There’s just one problem: mildew. When moisture gets underneath the adhesive, mildew finds a nice, friendly place to move in. In this case, the back of your car or RV might be protected—but now you have a new problem entirely.
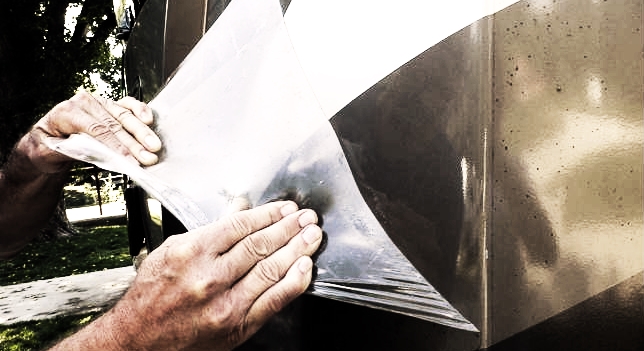
When most people try to remove this adhesive, they simply try to peel it off using only their fingers—the same way they might peel off the sticker on a fresh credit card. But if you’re expecting Diamond Shield to always come off that easily…it unfortunately is extremely hard to remove. We have some tips for making it easier on yourself.
The Solution: Adhesive & Sealant Remover

First step? Secure a bottle of Release Adhesive & Sealant Remover from RV by LIFE. It works on fiberglass, wood, metal, and glass, so you’ll be able to get more use out of it than simply removing Diamond Shield from your RV.
Next, take on the following steps in order—and watch this YouTube video to watch how it works:
- Using a plastic scraping tool and having your Release Adhesive & Sealant Remover handy, start by peeling back one of the corners.
- As you make more progress, spray on a bit of Release Adhesive & Sealant Remover to remove the secured glue.
- Only peel back a little bit at the time. Take it slow! You’re not in a race here—and Release Adhesive & Sealant Remover will work better the more thorough you are.
- Aim to peel the entire Diamond Shield in one piece, if possible. Even when you have a wide patch of it in hand, continue to use the Release Adhesive & Sealant Remover as you find patches of cured, stuck-on glue.
- Try to maintain a “handle” of already-peeled plastic so that you don’t have to continually scrape a glued-on edge of the adhesive.
It might sound like a lot of work, but once you get the hang of it, you should be able to peel back your Diamond Shield in just a few pieces. If you don’t use the right tools, however, you can expect a frustrating afternoon of trying to peel back a little bit of it, piece by piece, not realizing that the glue is working against you. Simply remove the glue with a little bit of Release Adhesive & Sealant Remover at a time and you’ll be good to go.
