


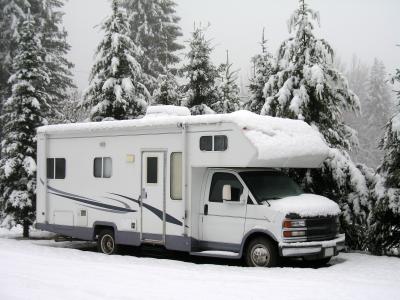
Even though nice weather might still be found in the
southern states, if you aren’t fortunate enough to get your rig out by now,
chances are you need to consider winterizing your RV. By taking a few steps
this month will help get your RV up and going quicker in the spring. While this
post is beneficial for all RV owners, please consult with your specific owner’s
manual for more exact instructions on how to winterize your RV.
Before you start, you will typically need a few basic items
that can be found at most RV parts stores. First, make sure you have non-toxic
RV antifreeze. While different size RVs require different amounts of
antifreeze, a typical rig should use around two to three gallons. You will also
need a water heater by-pass kit, a wand or brush to clean out your holding
tanks, a water pump converter kit, and a set of basic tools that is required to
remove drain plugs.
The first step in winterizing your RV is to remove and
bypass any inline water filters and then drain the fresh water holding tank
followed by the gray and black holding tanks. If your RV doesn’t offer a
built-in flushing system, use your wand or brush and a product like Flush King
so you can clean both the gray and black tanks at the same time. Once the tanks
are clean, feel free to use WD-40 on the termination valves.
Next, drain the water heater by removing the drain plug and
open the pressure relief valve. Remember; never drain the water heater when the
water is hot or under pressure.
Once all the hot water has been evacuated from your RV, open
up all hot and cold water faucets along with the toilet valve and outside
shower, if applicable. Then locate and open both the hot and cold low point
drain lines. To expedite the drainage, use the water pump to help force all
remaining water out of your system. Once drained, shut off the water pump and
close all faucets and cap all drains.
Now that all the water is out of the system, it is time to
protect it using antifreeze. First, install the water heater bypass kit. If you
do not do this, you will waste gallons of antifreeze since it will be stored in
the water heater and not circulating through your RV. Next, install a water
pump converter kit. This will be the small line coming out of the fresh water
holding tank. Once located, install a small piece of clear tube to the inlet
side of the pump and the other end into a one gallon jug of non-toxic RV
antifreeze.
After double checking the fitment of the hose, turn on the
water pump and pressure up the entire system. Once pressure level is reached,
slowly open the hot and then cold faucets on the nearest sink. Leave running
until antifreeze is seen. Continue to repeat this process throughout your RV
while keeping an eye on the antifreeze level in the container. Switch
containers as necessary.
Once antifreeze has been pushed through all faucets and showers,
flush the toilet until antifreeze appears.
Now that every sink and drain has visible antifreeze, turn
off the water pump and open a faucet to relieve all pressure in the system.
Then, once all pressure is evacuated, head to the city water inlet located on
the outside of your RV. Remove the screen located over the inlet and push the
valve down until you see antifreeze. Don’t forget to replace the screen.
Finally, with the remaining antifreeze, poor a cupful down
each drain and about 2-3 cups in the toilet and into the holding tank.
The last step in winterizing your RV is making sure your
water heater is turned off and you followed the steps associated with
winterizing other accessories your RV might have including ice makers or
washing machines. Your owner’s manual should have all this information.
While winterizing your RV might not be on your to do list
this month, it is something you need to accomplish if getting your RV back on
the road as soon as spring hits is something you have to do. By taking a few
minutes now could save you days or weeks of good RV living next year.
