
When the mercury drops, you don’t want the temperature
inside your RV to drop with it. That means you’ll have to safely lock away some
of the most critical points of temperature loss: the windows. Fortunately, window
insulation can be much more intuitive than you might guess. With the right
equipment and enough know-how, you can insulate your own windows cheaply and
quickly. Here’s how to insulate RV windows.
Check For Leaks
The first thing to do is to check your windows for any
potential temperature leaks. Cold air moving on your window is the most
recognizable and immediate sign that you have a problem. But how can you tell
where the cold spots might be? Here are a few signs:
- Lower
temperature. A lower general temperature in the RV is a sign that you might
have a leak somewhere. It won’t give you an immediate place to look, but it
should at least tell you that you should
be looking to insulate your windows. - The air
near the windows. Be sure to check the feel of your windows, moving your
hand to check for cold spots. This is especially important at the seams, where
most of your leaks are likely to occur.
Once you’ve checked for window leaks and you believe you’ve
identified the areas that need the most work, your job will be to inspect them
thoroughly. Does the window itself need to be replaced? Does the window frame
need replacement? Or is it a smaller issue, such as a leak in the sealant
around the window, or some issue with the seam?
In some cases, you should be able to simply repair the seam
itself with the proper sealant. Here’s how to do that.
Sealing Your RV
Windows For Better Insulation
Insulation starts at the seams. But what if you’ve never
covered a seam leak before? Here are some tools and strategies for getting your
RV windows to behave:
- Clean and
inspect the area. Clean out the area using a general cleaner like Suds.
If you have any adhesives that are getting in the way of an effective seal,
you’ll also want to use Release®
Adhesive & Sealant Remover. Allow the area some time to dry and
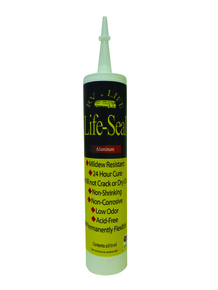
make sure it’s clear of debris before you move to the next steps. - Apply the
sealant. Using the appropriate sealant from our lineup of RV sealants,
use a precise applier to get the sealant to the source of the leak. It’s
important to take the time to consider your RV material and to read the labels thoroughly, as this will help ensure that you get the proper adhesion. Without
good adhesion, you may simply be spinning your wheels—and don’t be surprised if
the sealant then comes off later. It’s important to match it correctly.
With the sealant applied, you’re ready to enjoy a
weather-proofed and leak-free RV window. But don’t forget to prepare for all
sorts of other RV issues with the right RV products here at RV by LIFE.